At some point we all want to try out that Virtualization Software on our PCs. For some it’s just running Android or Mac OS on our systems, while others want to go back in time! I know, not everybody liked the good old days of typing syntaxes and that entire hullabaloo, but some may still want to find their ancestors. Be it debugging on an old OS or just to relieve the glory days of MS-DOS.
This tutorial will teach you how to install Windows 3.1 on VirtualBox. To really do this requires typing lots of lines of code and all that stuff, but I’ve made it simple. All you have to do is get the Windows3.1.ova file, double click it, and voila! You get Windows 3.1. (In theory it’s not that easy but I’ve made it simple)
+ PS I’ve included both Workgroups model and Personal one. I’d recommend the latter!
>Get Windows3.1.ova: |Windows 3.1 Workgroups| |Windows 3.1 Personal| (password is “hellohelp” without the commas + it’s a 7zip file so you’ll need WinRAR or 7Zip) J
>Get VirtualBox (just Google it) J
Double click the .ova file and follow steps until you get to the screen bellow.
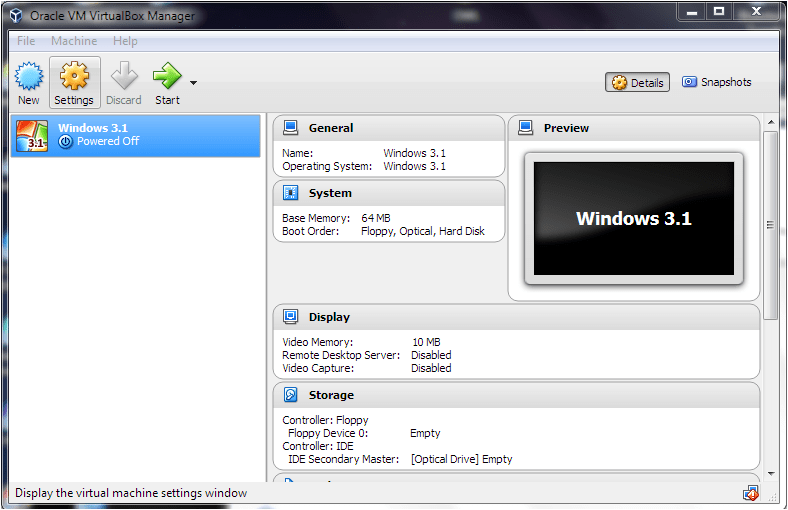
Now click start. (Don’t worry about RAM and stuff the .ova file should sort all that out). When greeted with the MS-DOS style screen key in “win”. Windows 3.1 should start up.

You will then be greeted to the Windows splash screen and finally the Program Manager windows. Click on Help, then Windows Tutorial to learn how to use Windows 3.1


Note that you’ll be greeted with the DOS interface every time and that you should key in “win” from the directory they show you at first. You can change settings according to how you like in the Settings in VB. It is possible to run DOS if you don’t want boot into Windows 3.1
Includes: DOS 6.22, Windows 3.1 for Workgroups/ Windows 3.1 Personal
Password is also included as a text file inside of the 7zip archive (hellohelp not hellohelp.txt) 😉

You must be logged in to post a comment.