Tools like UnNetBootIn will help anyone create a bootable USB drive. But when all you have is a 16GB USB and a 200MB OS, you might be wandering how to boot more than one OS from that USB. UnNetBootIn certainly won’t help you do this, as it would just replace the current OS. And that’s when you consider whether to buy another USB when you read this.
We will be using another tool, similar to UnNetBootIn, to accomplish this. We will use UnMultiBootIn, as software commonly known as YUMI. How this works is by creating one entry in the MBR and adding on more OSs to the existing entry (vesamenu.c32). Furthermore, you can create bootable Windows discs as opposed to UnNetBootIn. You can even have a Windows and a Linux on a single USB! What’s more is that it won’t make your USB read-only (like some other tools I know of.L). The only downside is that if you want to uninstall a particular OS, you’ll have to do so by using YUMI again. That said; let’s get on with how to create a multiple OS bootable USB.
First, you’ll have to get the YUMI tool. I’ve gone to the liberty of providing it as portable software. It’s only available in 32-bit.
Once you’ve downloaded it and extracted the files (it’ll be better to just get the folder instead), put the files in an easy-to-reach directory.
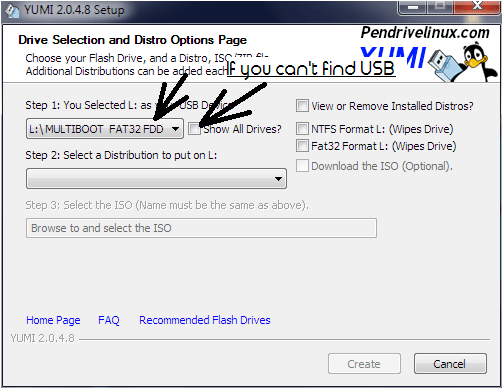
Launch “YUMIPortable.exe”. Click I agree. Then you will be on the following page.

Select the first drop-down menu and select your USB. (You must have your USB plugged in and explorable at this point). If you can’t find your USB, try ticking “Show all devices?” option. (Note that when this is ticked, you’ll also see your internal drives as well).
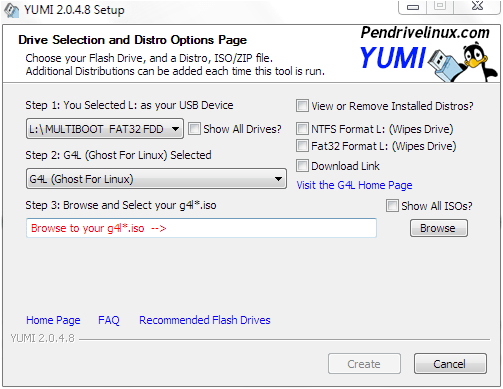
Once the USB is selected, you’ll see the above panel. If you want to uninstall an OS from the list, tick “View or Remove Installed Distros” option. Then select the OS you wanna uninstall and click “Remove”. If you want to install an OS, click on the second drop-down menu and select the distro of your OS (YUMI has options for exotic OSs like Android x86 as well).
Now you have the option of either, downloading the needed ISO, visiting the Homepage or pointing to a local ISO/IMG file. [You can point to a local ISO by clicking “Browse” and pointing. However, if you can’t find your ISO, try ticking “Show all ISOs?” option].
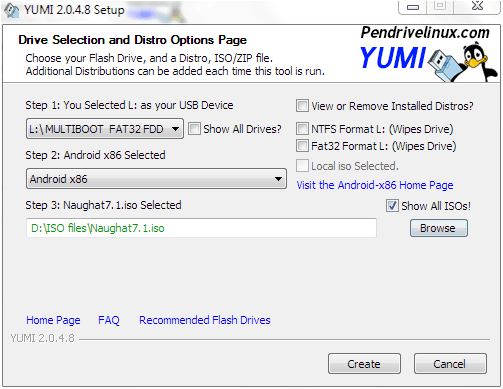
Once the ISO is selected, click “Create”. If this is the first time this USB is being used by YUMI, it’ll ask for confirmation on whether to install, if not, it’ll just install.
Once it shows “Completed” in green at the bottom of the current task list, click next (or in some versions, just “yes” if you wanna install more OSs), then click “Yes” if you want to install more OSs or “No” if you’re done. YUMI will remember what OSs are installed next time you wanna install a new OS. Only uninstall OSs through YUMI.
Once you’ve done all that, boot from the USB. You’ll come to a similar screen to the one below.
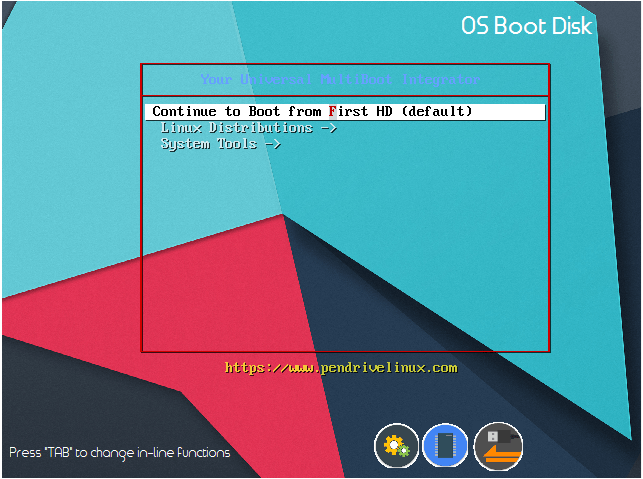
From that screen, clicking on your OS category, then pointing to the OS will bring you to the OSs native boot loader interface. From there, do what-ever you want to do.

You must be logged in to post a comment.