Since Windows 10’s release in 2015, more and more users have switched to Window 10. Most will probably have used “Free Upgrade to Windows 10” option when it became available. But what if you didn’t upgrade. And now you want to dual-boot it with your current OS (or just install it!). All the forums you’ve read are incomplete. So, here ye are. At the best place to learn! Let’s get started.
But before we do, we’ll have to clear the air about a few things. This tut is only meant for PCs complying with the following specs: an optical drive (CD/DVD), a non-OEM version of Windows installed (if you’re dual-booting), UEFI can only single boot (you can dual-boot, but it’s a little crappy), a PC satisfying the minimum system requirements.
Let’s clarify all that. The first you probably understood. The second, when dumbed down, means that your PC can’t have a version of Windows that was installed from the time you bought the machine (if so, format the entire disk and then install Windows 10). The third is explained itself. The fourth, minimum requirements, can be read HERE. If you don’t have an optical drive and would like to install Windows with a USB, there’s a better method to that HERE.
You will also need the Windows 10 ISO and an empty DVD. I’d recommend you to get the x86/x86_64 ISO (that’s 32-bit & 64-bit Windows 10 all-in-one). The Windows 10 ISO can be gotten off the Microsoft website for free (that’s what I recommend). The empty DVD has to be a non-dual-ply (or something like that) disc.
|IMG Burn|
We’ll need IMG Burn to burn the disc image to the DVD. For advice on installing Windows, read this.
First off, download the Windows 10 ISO. Then download IMG Burn.
Next, install IMG Burn. Insert the empty DVD. Open up IMG Burn. Then hit “Burn image file to disc”.
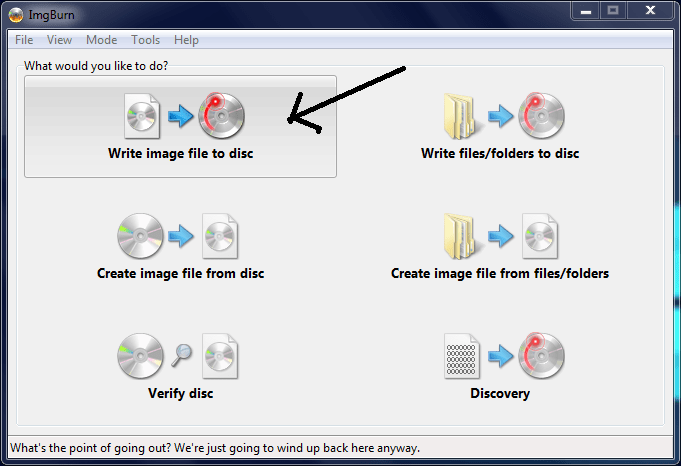
Then choose the Windows 10 ISO. Next, select the drive in which the DVD is in.

Select the ISO by clicking the icon pointed out by the top arrow. Keep “Verify” ticked. Then hit burn (last arrow pointing to it).
The burn will finish depending on your hardware speeds. Also note that at one point the DVD tray will come out. When this occurs, simply push it back in.
Next comes the hard/easy part. If you are dual-booting, you will need to make another free partition (google and find that out yourself!). Keeping that in mind, shut down your PC after you insert the newly burnt DVD into the drive. Boot up from the DVD (go to the BIOS/UEFI setup, look for boot order, set the Optical drive as the first one (oh! If your PC doesn’t boot up from the disc that way, try setting “removable devices” as well as “disc drives” before your hard disk).
If all that went well your PC will come to the Windows setup screen (if your PC just reboots after a couple of minutes after the Windows logo, your PC probably doesn’t meet the minimum requirements or there is a hardware failure).
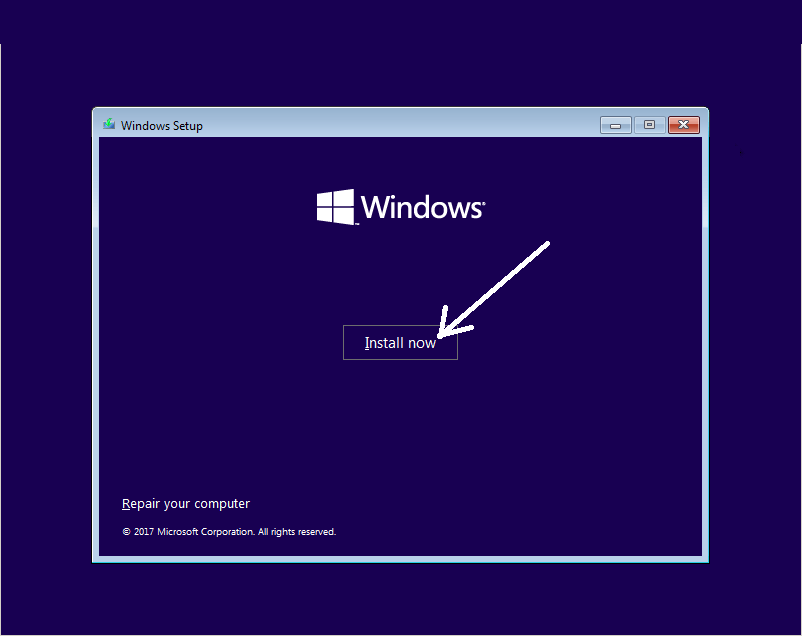
Click on “Install Now” and complete the setup as you would on any other Windows version (however, if you’re dual-booting, when the setup is in the “Choose partition” part, select the partition you prepared beforehand. If you’re just single booting, delete the old Windows partition and the system reserved partition and then click on the formatted partition). When it comes to the rebooting part, set the boot order as internal hard disk again (this is just a safety precaution). Half an hour later, you will have your beloved Windows 10 working. If you encountered any errors, just google up the error code and find a suitable solution.
Hope that helped somebody! 🙂
If you’d like to know how to install Windows without using a DVD/CD/USB or even going through the setup wizard directly on to your hard disk, read this article.

You must be logged in to post a comment.