Remix OS revolutionized the Android experience with its desktop-like interface and best all-around ARM native code emulation. But only a few of us (OK, everyone who ever visited the website knows) know about VM counterpart. Yes, you heard it right, Remix OS also works as an emulator (Big deal! That’s so last year).
Although the Remix OS itself can work on older computers, the emulator requires a tad more features. I’m talking about it needing hardware virtualization and all that junk! This is mainly due to QEMU virtualizing the entire system. But there is a way to bypass this and emulate Remix OS on older CPUs. And we are gonna teach you how! (Please note: if your CPU does support hardware virtualization, please use the official Remix Player as it is a hell o’ a lot easier than this!)
Before we begin, we probably get over the “kernel panic” myth. This situation arises when the guest code runs on a processor thread that’s already being used or is being actively used by the host. Many blame it on a buggy kernel in Android x86, but the real reason lies in the guest code translation features of VirtualBox. Yep, you heard that, the all-powerful, open-source and all that crap-in VB is to blame for you missing out on a VM with Android M. (Blame them for a good time before coming back to read this!). So we will be switching to the best program for VM hosting. They’re so good, that they have the word “VM” in their name. Yes, we’re talking about VMware. As they practically invented x86 virtualization, they have way lesser (or next to none) bugs that are found crappy VB.
Now we’ll get back to the topic.
You’ll first need a few things, mainly, VMware Player or Workstation and the Remix OS 32-bit ISO file.
|VMware Player |32-bit| |64-bit|
|Remix OS| you don’t need to get it if you already have the 32-bit ISO. (PLS get the 32-bit ISO as the 64- bit version requires VT-x, even if you have a 64-bit host)
Create a VM with the second option; Auto detect OS and point to the Remix OS ISO file. Go through all the steps with the default settings. You can change the name and VM location if you like. But remember to untick “power on VM after creation”.
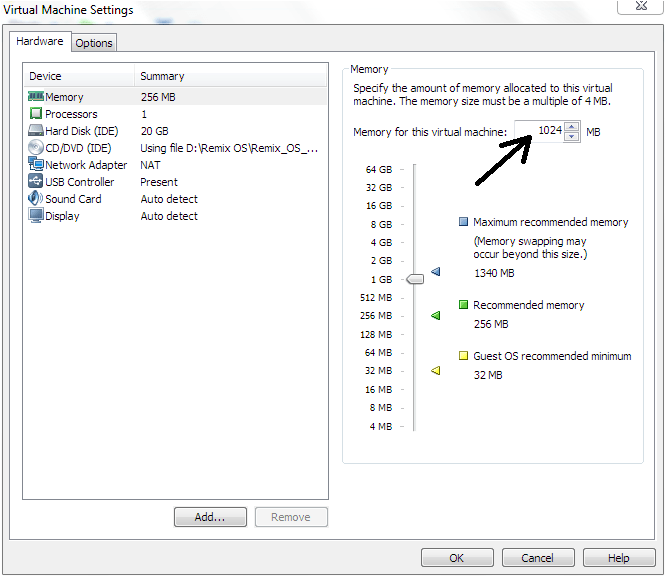
Click on “Edit VM Settings”. And configure the RAM to anything above 1024MB. Next set the display size to “800 X 600” (set graphics memory to 32MB). And also remove the network card, for now.

Click OK and boot up the VM. You will be greeted by a GRUB boot screen. Hover over the “Resident Mode” tab and press the “Tab” button on your PC keyboard. Then edit the entry ‘till it looks like the following screen. [enter “INSTALL=1].
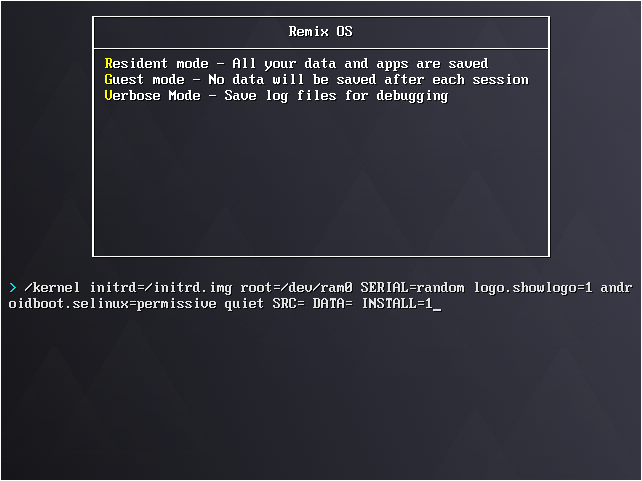
When all’s done, press Enter. You’ll then see this screen:
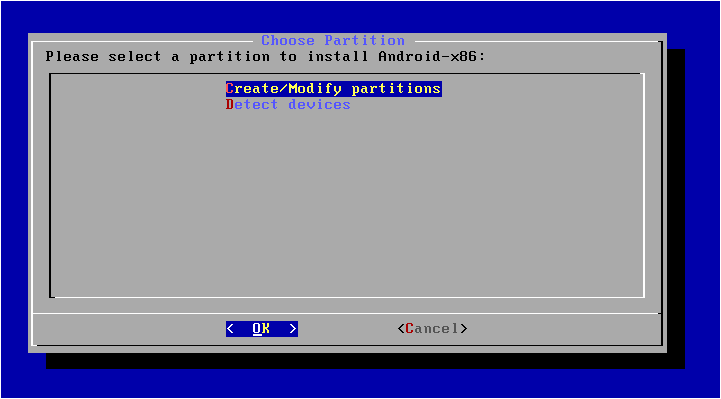
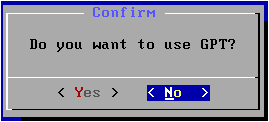
From that, select ‘Create/Modify partitions” choose “No” to use GPT message.
You’ll then see this screen. In that screen, choose to create a new partition (default settings). Once you come to a screen like the one below, highlight “Write” and press enter. Then key in the word “yes” and press enter. Then choose quit.

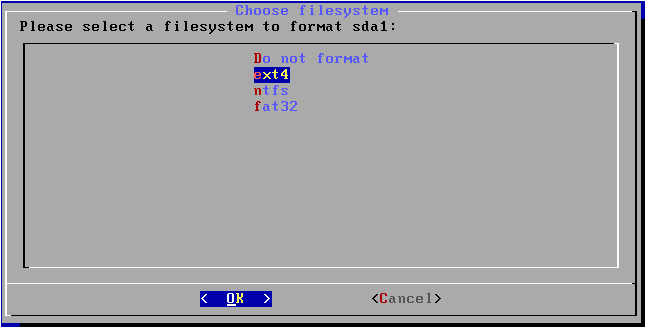
You’ll now see a single partition at the top. Click on that entry (by this time you’ll be back in the first screen you encountered after the GRUB screen). Then choose to format that to “ext4” format.
In the next screen, choose to install GRUB boot loader [YES to the “install GRUB” question].

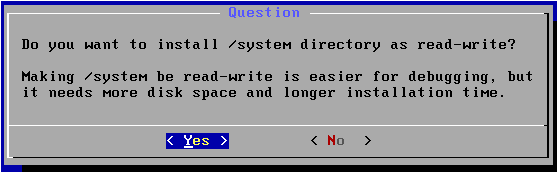
Next choose to make the /system directory read-write [YES to “make /system read-write].
It’ll take a few minutes to copy all the data. When that’s done, choose “Reboot” from the list and press OK. Remix OS will boot up. (It’ll take a few minutes for the first boot). And don’t expect near-native performance either, but if it is just for a little exploration, you’re fine.

You must be logged in to post a comment.