Ever wondered how to get that native running Lubuntu to run on a VM? Search that exactly and you’d probably get a tut telling you how to install that on a VM. That or you’ll get a guide telling you how to “virtualize a physical machine”. Well, you gotta blame google man! This is different. I’ll be showing you how to run ANY OS, native when you want to, and a VM when you need it quick (if you were trying to find one of the two said above, search ‘em). If you’ve used a Mac, you’re probably familiar with this technique (with BootCamp doing pretty much the same thing).
Do note that I’ll be showing you how to run the same instance of an OS, as a VM, and as a native OS. So, for example, say you got a native installed Kubuntu on {ext4 (1,1)} (that’s disk 2 partition 1 for you starters). And say that you wanna run the same thing on a VM. I’ll be teaching that (emphasis on that: we are going to run the same OS on the same partition with all your changes/data preserved in-between).
To start with, you’ll need a VMware product, namely, VMware Player (or if you’ve already gotten it: VMware Workstation). Then we’ll need “PLoP” (don’t laugh, that’s what it’s called). And finally, the OS you prefer, installed native (ideally, on a second HDD).
|VMware Player |x86-32| |x86-64|
|PLOP ISO| you’ll be given a 7Zip file, in which the ISO resides. The password is “hellohelp” (without quotes)
I have installed Kubuntu (Native) on a second HDD. The boot sector is written for that partition only (not the entire MBR). It is installed in “/dev/sdb3” (the 3rd partition on the second disk). You will have to get to this step alone (possibly, with the help of Google). Once you’re there, read the rest of this tut.
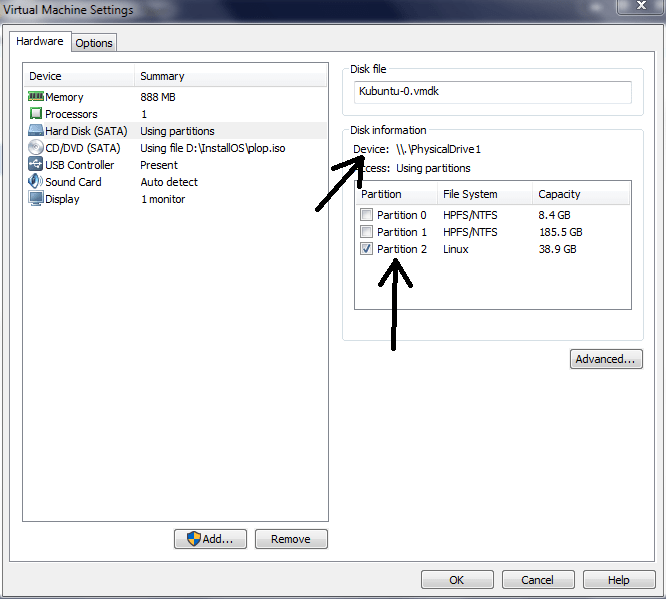
Install VMware Player. Create a new VM (with the specs you’ll need. I’ll be showing you how to do it with Kubuntu, but it should be easy enough for the rest. Keep in mind, that this works more fluidly and efficiently in Linux based systems). The hard disk should be set as a physical drive (this will either be asked on “Create a New VM” or in VM configuration > New HDD > Physical Disk (Advanced) > Use Partitions > %PARTTION%). To know which partition it is specifically, check Disk Management (You’ll also need to know exactly which partition your OS is on (the partition number. Here, my one is in the third partition {/dev/sdb3/}). OR if your bootloader is in the MBR, just select “Use entire disk” when creating the new disk.
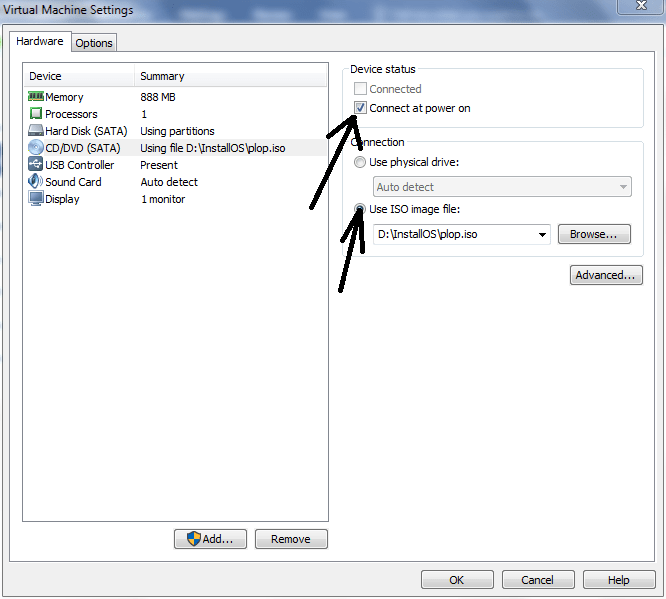
Then, mount “PLoP.iso” on the same VM. You don’t have to do this if your boot loader is in the MBR.
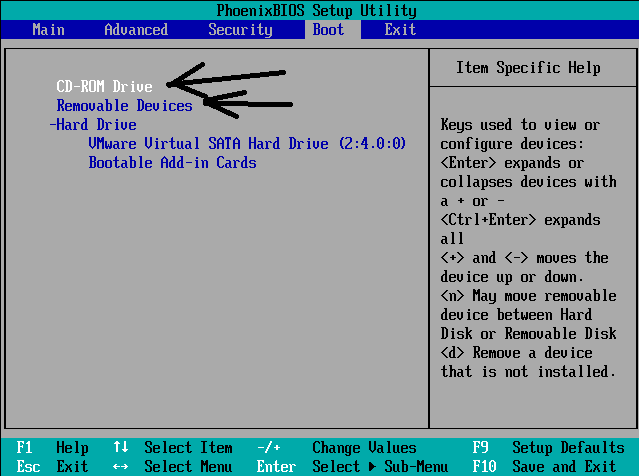
Boot up the VM to the BIOS (Sorry, UEFI native VM is not supported yet (and yes, there is an option to boot in EFI). Set the VM to constantly boot from the “PLoP” image. Only if your bootloader is not in the MBR.
Then boot up the VM. You should see the PLoP home screen (below). (Only if…)
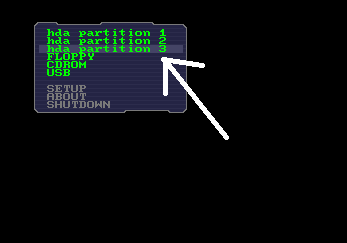
This is when you’ll need to know that partition order. I’ll be clicking “hda partition 3”. Now, if you’ve no clue of the partition, just try all of them till you hit home! (As the only true partition VMware will present will be the right partition). If you did everything right, your OS should boot up. [Note: I don’t recommend you to access the partition while it’s still in use]. If you didn’t mount the PLoP image and your bootloader is in the MBR, it should start booting up by now.
If you boot up the same OS natively, you will have all the changes preserved.
Hope that helped some lost soul 🙂 !

You must be logged in to post a comment.