How to Install ADB
For windows users, download this zip file and extract it to an easy-to-access folder. Then install the necessary drivers for your device from this website. Unfortunately, macOS and Linux users have to get the entire Android Platform SDK (200MB) in order to use ADB. Get it here. Once you have it installed, proceed to the next steps.
Note: Mac users should read this before proceeding .
Preparing Your Device for Use with ADB
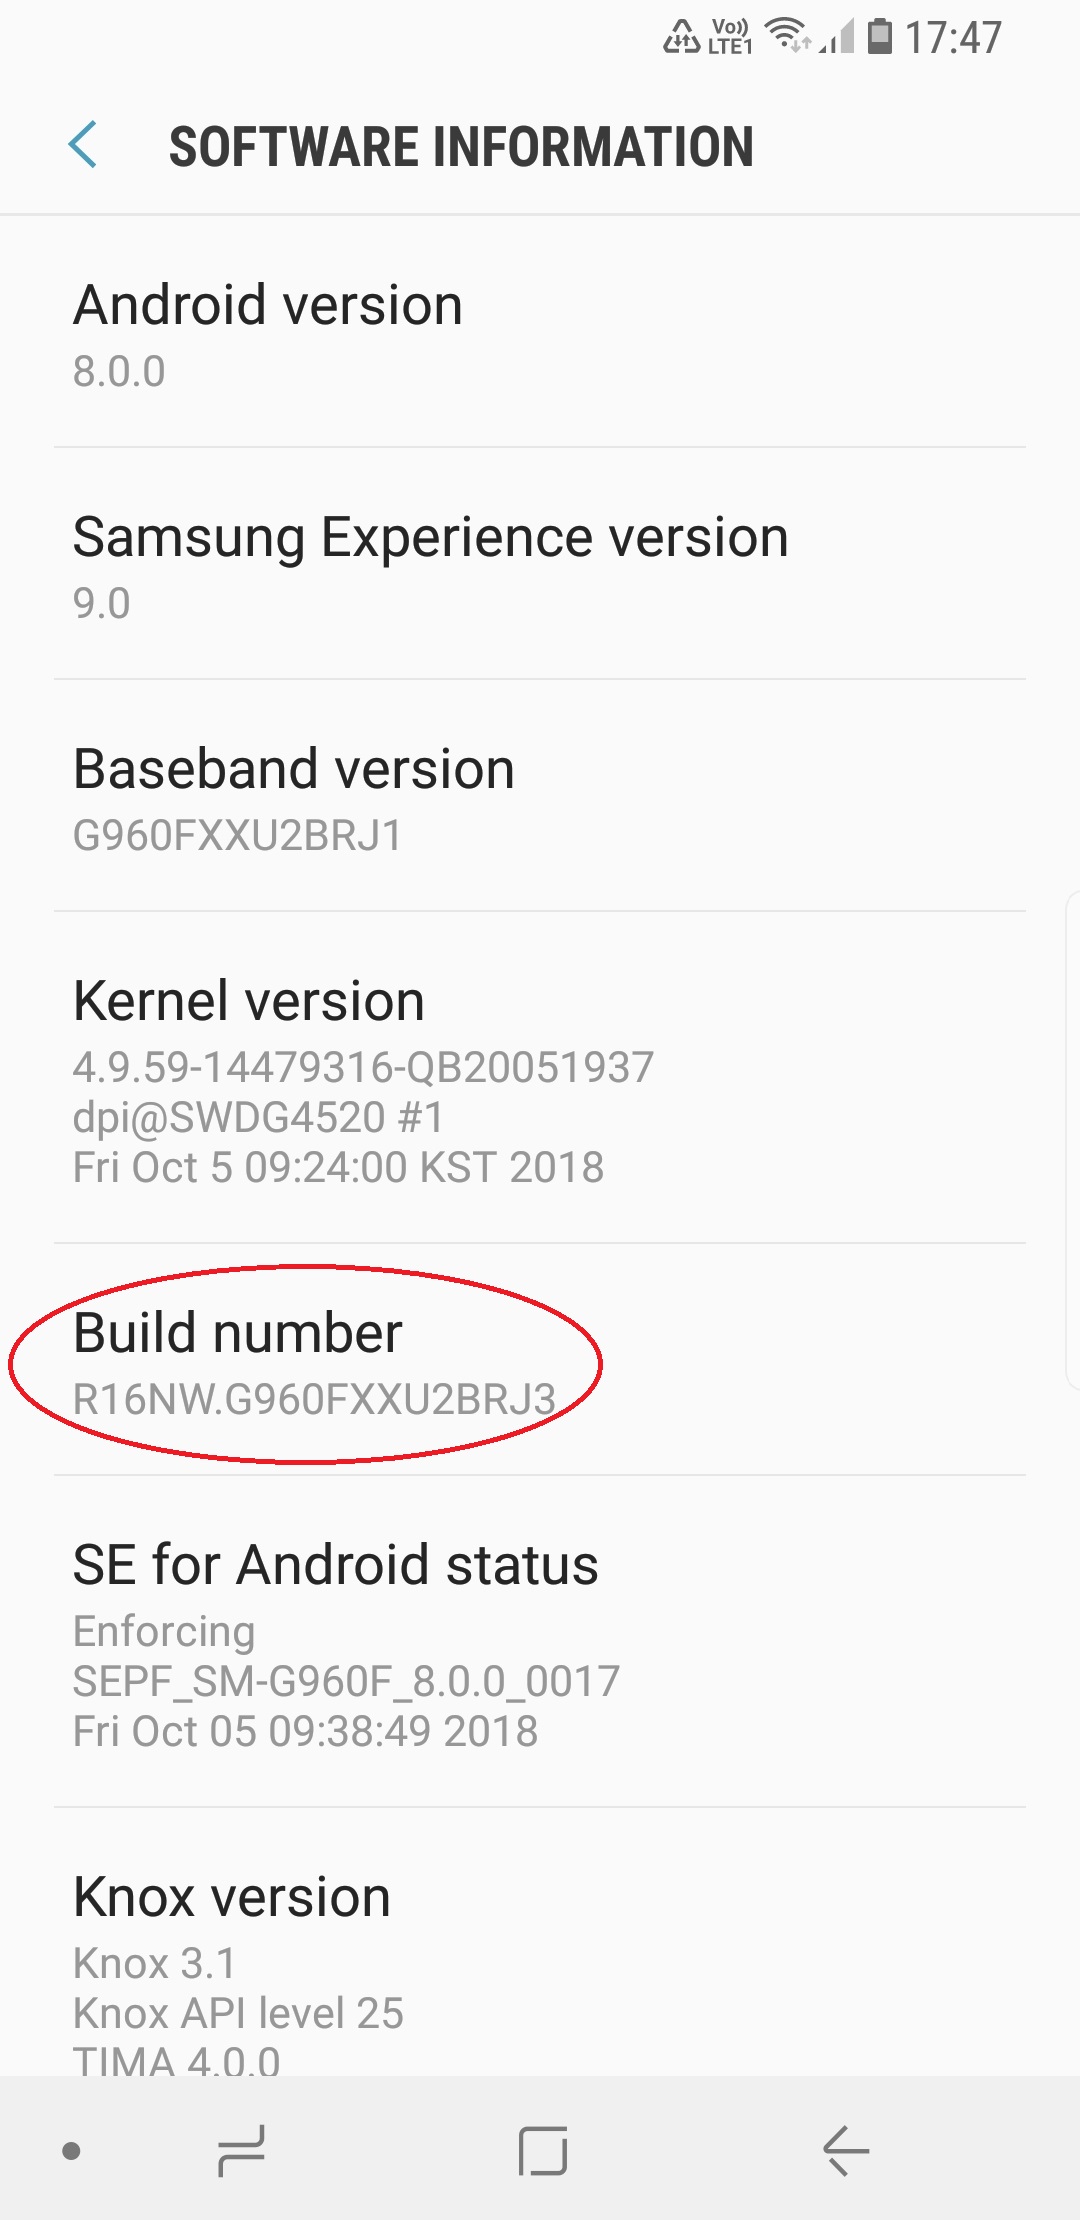
Enable developer options in your device (Settings > About Device > Tap Build Number a couple of times until “Developer Options Enabled” appears).
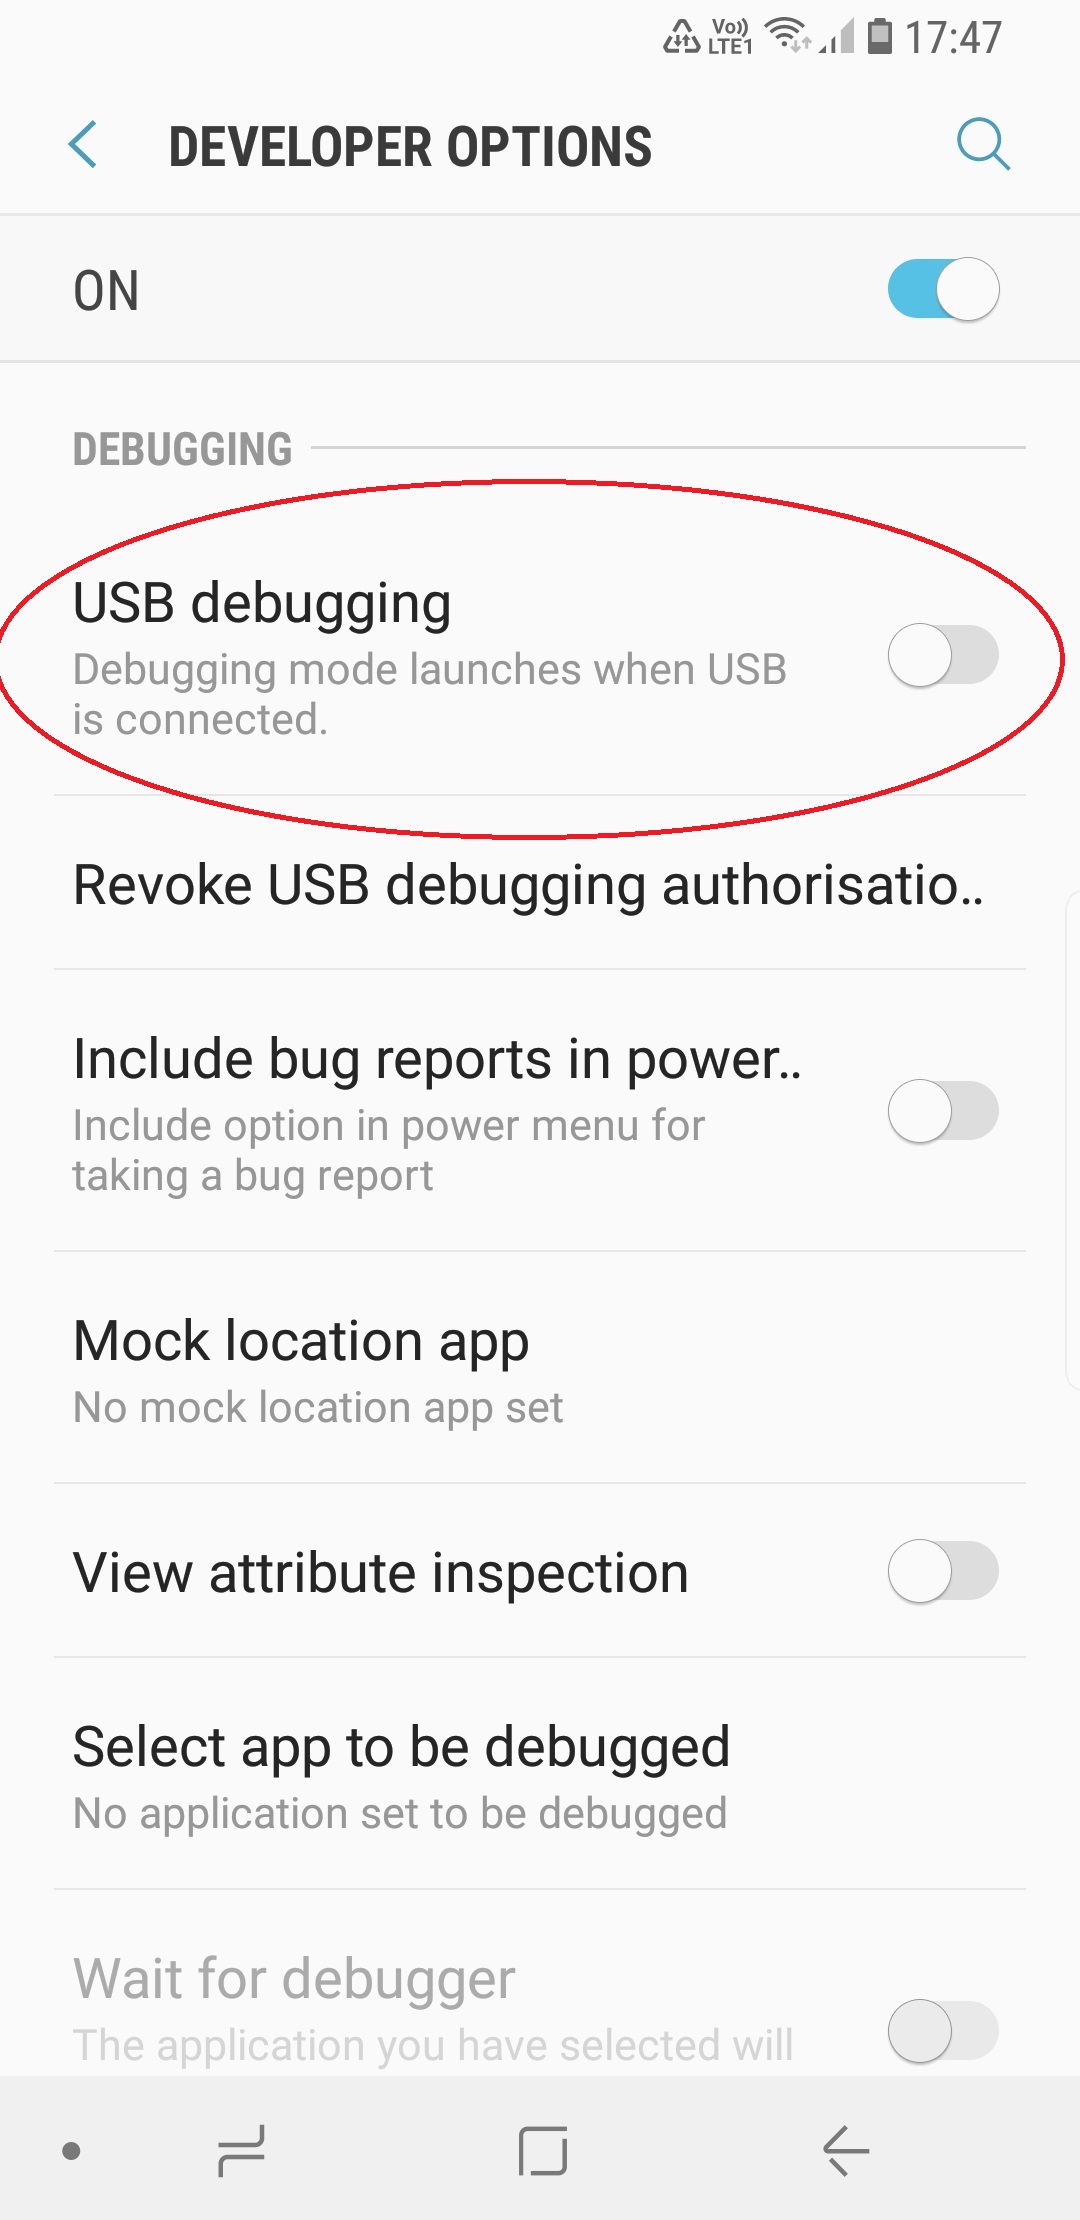
Then enable “USB Debugging” and “Verify Apps via ADB/APT” in Developer Options.
Connect your Android device to your PC.
Use ADB
Navigate to where you extracted the above said zip file (Windows). Open a command prompt window in that folder. Type “ADB” followed by whatever commands you want to send to the device. For macOS and Linux users, just open a Terminal windows and type “adb” followed by whatever. Under some circumstances it might be necessary to navigate to ADB’s root directory and then executing commands (Unix-based).
Note: when connecting a device to your PC for the first time, a dialog box will appear on your device asking for permission to let your PC access your device, to which you must tick the “Remember This Computer” box and click “OK”.
Manage Your Device with ADB
ADB has a wide variety of functions for managing your device, moving content to and from your phone, installing apps, backing up and restoring your software, and more. Think of this as a general reference and not an encyclopedia. Remember to research your particular device before doing any of this! You can use ADB while your phone is plugged in to a computer.
adb devices
Function: Check connection and get basic information about devices connected to the computer. When using ADB, this is probably the first one command you’ll run. It will return a list of all devices that you have connected to your computer.
adb reboot recovery
Function: Reboot your phone into recovery mode. A lot of functions like flashing ROMs to your phone require you to boot into recovery mode. Normally, this requires you to hold down a particular set of buttons on your phone for a certain length of time, which is obnoxious. This command allows you to boot directly into recovery mode without performing the complex finger dance of your people.
adb reboot-bootloader
Function: Reboot your phone into bootloader mode. Along the same lines as the previous command, this one allows you to boot directly to your phone’s bootloader. Once you’re in the bootloader, ADB won’t work anymore. That’s where fastboot comes in (which we’ll get to in a bit). However, much like the recovery command, it’s much easier to boot into your bootloader with a command on your computer than a complex series of buttons on your phone.
adb push [destination]
Function: Copy files from your computer to your phone. The push command allows you to copy files from your computer to your phone without touching your device. This is particularly handy for copying large files from your computer to your phone like movies or ROMs. In order to use this command, you’ll need to know the full file path for both your source and destination (for all you newbies, here’s the path of your internal storage “/data/media/0” or /storage/emulated/0”. Host-side path should be easy. Ex. For a file named hellworld.txt in your downloads folder; “Users[username]Downloadshelloworld.txt” on macOS or “C/Users/[username]/Downloads/hellworld.txt”).
adb pull
Function: Copy files from your phone to your computer. The yin to push’s yang, the pull command in ADB allows you to copy files from your phone to your computer. When pulling files, you can choose to leave out the destination parameter. In that case, the file will be copied to the folder on your computer where ADB itself lives. You can then move it to wherever you’d prefer like normal.
adb install
Function: Remotely install APKs on your phone. You can use this command to install an app on your phone without touching it. While this isn’t a terribly impressive trick for an app that’s on the Play Store (where you can already remotely install, uninstall, and update apps), it’s quite handy if you need to sideload an app.
adb shell
Function: Open or run commands in a terminal on the host Android device. There are so many great things you can do with it. Most of us don’t tend to bother with the terminal in Android because we don’t want to type long text-based commands on a tiny touchscreen. However, the adb shell command allows you to open up a full terminal on the host device. Alternatively, you can type “adb shell” followed by a valid terminal command to execute just that one command by itself.
adb backup
Function: Create a full backup of your phone and save to the computer. Backing up your Android phone is already something you can and should be doing automatically. However, if you need to create a complete backup before hacking away at something particularly risky, you can create a full backup with a single command. You don’t even need root access (though this may mean that some protected data can’t be backed up). You can read more about the parameters for this command—and there are a lot of them—here.
adb restore
Function: Restore a backup to your phone. The corollary to the previous command, adb restore allows you to point to an existing backup file and restore it to your device. So, for example, type “adb restore “/Users/[username]/Desktop/[restorefile].zip” and your phone will shortly be back to normal.
adb sideload
Function: Push and flash custom ROMs and zips from your computer. This command is a relative newcomer to the ADB field and is only supported by some custom recoveries. However, you can use this single command to flash a .zip that’s on your computer to your phone. Once again, this allows you to flash whole OSs (or anything else you can flash with a .zip file) without touching your phone. These commands are just some of the more useful ones you can use with ADB installed on your computer. You may not want to use it all the time for everyday tasks, but when you need them, you’ll be glad you have them.
Unlock and Modify Your Phone’s Firmware with Fastboot
As stated above, fastboot allows you to send commands to your phone while in the bootloader (the one place ADB doesn’t work). While you can’t do quite as many things here, the things you can do are awesome, including unlocking certain phones—like Nexuses and certain others—as well as flashing custom recoveries and even some ROMs. It should be noted, though, that not all phones support fastboot and if you have a locked bootloader, you’re probably out of luck here. The devices that do support this are most Huawei, Oppo, LG, and anything (Including some high-end Samsung devices) with the “Unlock Bootloader” option in Developer Options . That being said, here are some of the most useful tools in fastboot’s arsenal.
fastboot oem unlock
Function: Unlock your bootloader, making root access possible. When people go on about how “open” Nexus devices are, this is what they’re talking about. Most phones require a root exploit to gain superuser access and the ability to heavily modify your phone’s firmware. With a Nexus device, you can unlock your bootloader with a single command. From there, you’ll be allowed to install custom recoveries or give yourself root access. It should be noted, this command will also completely wipe your phone. This means it’s a great command to run when you get a brand new phone, but if you’ve been using yours for a while, do a backup first.
fastboot devices
Function: Check connection and get basic information about devices connected to the computer. This is essentially the same command as ADB devices from earlier. However, it works in the bootloader, which ADB does not. Handy for ensuring that you have properly established a connection.
fastboot flash recovery
Function: Flash a custom recovery image to your phone. As with everything else in this list, you can install a custom recovery on your device without touching it by using this command.

Hi there to every body, it’s my first pay a visit of this website; this blog includes remarkable and really excellent information designed for readers.|
LikeLike
Hi, just wanted to tell you, I loved this post. It was helpful. Keep on posting!|
LikeLike
Just wish to say your article is as amazing. The clearness in your post is simply cool and i could assume you’re an expert on this subject. Well with your permission let me to grab your RSS feed to keep up to date with forthcoming post. Thanks a million and please keep up the gratifying work.|
LikeLike
We’re a group of volunteers and starting a new scheme in our community. Your site offered us with valuable information to work on. You have done an impressive job and our whole community will be grateful to you.|
LikeLike
Hi, I do think this is a great blog. I stumbledupon it 😉 I’m going to come back once again since I saved as a favorite it. Money and freedom is the best way to change, may you be rich and continue to guide other people.|
LikeLike
I have read so many articles on the topic of the blogger lovers but this post is actually a good article, keep it up.|
LikeLike
I have been browsing on-line greater than 3 hours nowadays, yet I never discovered any fascinating article like yours. It is beautiful price enough for me. In my view, if all web owners and bloggers made just right content material as you did, the net might be a lot more helpful than ever before.|
LikeLike
Wow, this post is nice, my younger sister is analyzing these kinds of things, therefore I am going to let know her.|
LikeLike
Hi there I am so glad I found your webpage, I really found you by error, while I was researching on Google for something else, Regardless I am here now and would just like to say many thanks for a fantastic post and a all round thrilling blog (I also love the theme/design), I don’t have time to go through it all at the moment but I have saved it and also added in your RSS feeds, so when I have time I will be back to read more, Please do keep up the awesome work.|
LikeLike
I’m extremely impressed with your writing skills and also with the layout on your weblog. Is this a paid theme or did you modify it yourself? Anyway keep up the excellent quality writing, it is rare to see a great blog like this one these days.|
LikeLike
I love it whenever people come together and share views. Great site, continue the good work!|
LikeLike
Wow, that’s what I was seeking for, what a information! existing here at this weblog, thanks admin of this site.|
LikeLike
Awesome blog you have here but I was wanting to know if you knew of any message boards that cover the same topics discussed in this article? I’d really like to be a part of online community where I can get advice from other experienced people that share the same interest. If you have any suggestions, please let me know. Kudos!|
LikeLike
Thank you a lot for sharing this with all of us you really recognize what you are speaking approximately! Bookmarked. Kindly additionally consult with my website =). We can have a hyperlink exchange contract among us|
LikeLike
I have read so many articles or reviews regarding the blogger lovers but this article is actually a pleasant paragraph, keep it up.|
LikeLike
each time i used to read smaller articles or reviews which as well clear their motive, and that is also happening with this piece of writing which I am reading now.|
LikeLike
I am sure this paragraph has touched all the internet users, its really really pleasant post on building up new webpage.|
LikeLike
Hey There. I found your blog using msn. This is an extremely well written article. I will make sure to bookmark it and return to read more of your useful info. Thanks for the post. I’ll certainly return.|
LikeLike
Great goods from you, man. I have understand your stuff previous to and you are just too magnificent. I really like what you’ve acquired here, certainly like what you’re stating and the way in which you say it. You make it entertaining and you still take care of to keep it wise. I can not wait to read far more from you. This is really a great website.|
LikeLike
No matter if some one searches for his vital thing, so he/she desires to be available that in detail, thus that thing is maintained over here.|
LikeLike
Greetings! This is my first comment here so I just wanted to give a quick shout out and say I genuinely enjoy reading through your blog posts. Can you recommend any other blogs/websites/forums that go over the same topics? Appreciate it!|
LikeLike
It’s very straightforward to find out any matter on net as compared to books, as I found this paragraph at this site.|
LikeLike
Fantastic website you have here but I was curious if you knew of any user discussion forums that cover the same topics discussed in this article? I’d really love to be a part of community where I can get advice from other experienced individuals that share the same interest. If you have any suggestions, please let me know. Thank you!|
LikeLike
Normally I don’t learn post on blogs, however I would like to say that this write-up very compelled me to try and do so! Your writing style has been amazed me. Thanks, very great article.|
LikeLike
Thank you for every other informative blog. Where else could I am getting that type of info written in such an ideal approach? I have a undertaking that I’m simply now operating on, and I have been on the look out for such info.|
LikeLike
When someone writes an paragraph he/she retains the idea of a user in his/her mind that how a user can know it. Thus that’s why this paragraph is outstdanding. Thanks!|
LikeLike
Hi mates, how is everything, and what you desire to say regarding this article, in my view its in fact remarkable in favor of me.|
LikeLike