ADB (along with “Fastboot”) is perhaps the best tool (along with “Fastboot”) for managing your android devices. With functions ranging from a simple app install to an entire data backup. We covered all the greatness of ADB in a past post.
And the “Android x86” project is also a significant asset for an application developer (to test your apps in a virtual environment), being faster than the Android Emulator provided by Google with their Android Studio kit (yes, they do provide an x86 based image but it’s got its own problems). You’ll be better off installing Android on a VMware virtual machine anyway.
But ADB use is kinda crappy (if not downright impossible) in a VM. If you googled how to achieve this, you’ll find people telling you to “excecute “netcfg” on a terminal console”, but the command “netcfg” is not available in all android versions. So you’ll be left with a half-useful development environment.
But we found a solution: a way to get ADB working on [almost] any Android VM running on a VMware product. Read on to find out how!
First, we’ll need a few things: A VMware hypervisor: Fusion/Workstation Pro (NOTE: you can try this with Parallels Workstation/Desktop, VirtualBox or VMware Workstation Player but there’s no guarantee it’ll work. Furthermore, if you use VMware Player, the “vmnetcfg” app won’t be there making the whole process needlessly complicated), a distribution of Android x86 including and after “Android 4.4 R1” already installed on a virtual machine and “Android Platform Tools” (Google’s fancy name for ADB + fastboot. It’ll be already installed if you have Android Studio installed if not, Windows users can use this without downloading the entire 2GB suite (Mac/Linux users have no choice. If you’re planning to use ADB to push files/install apps on the Android VM, you can just get the command line tools instead of the whole thing)
That said, let’s start!
Since this is part guesswork, open Virtual Network Editor (either through the shortcut, the “Edit” menu in Workstation or [VMware Fusion > Preferences > Network > + icon] in Fusion or through “vmnetcfg” located at the install directory. Excecute with Admin/Root/Superuser rights). Click “Add Network”, select whichever free node you prefer and click OK
Configure the new network to be “Host-Only” and click “DHCP Settings”.
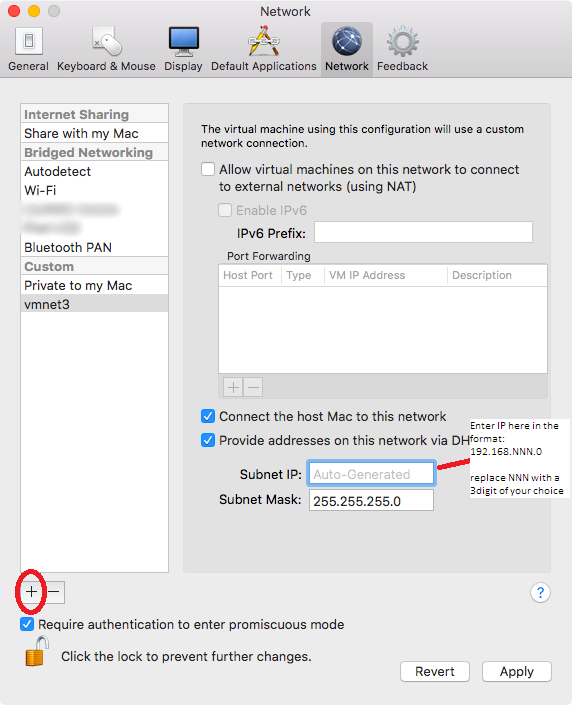

Edit the last digits of “Starting IP Address” and “Ending IP Address” to be close (numerically). So if you have:
Starting IP: 192.168.245.128
Ending IP: 192.168.245.255
Change it to:
Starting IP: 192.168.245.128
Ending IP: 192.168.245.130
Why we did this will become clear further-on.
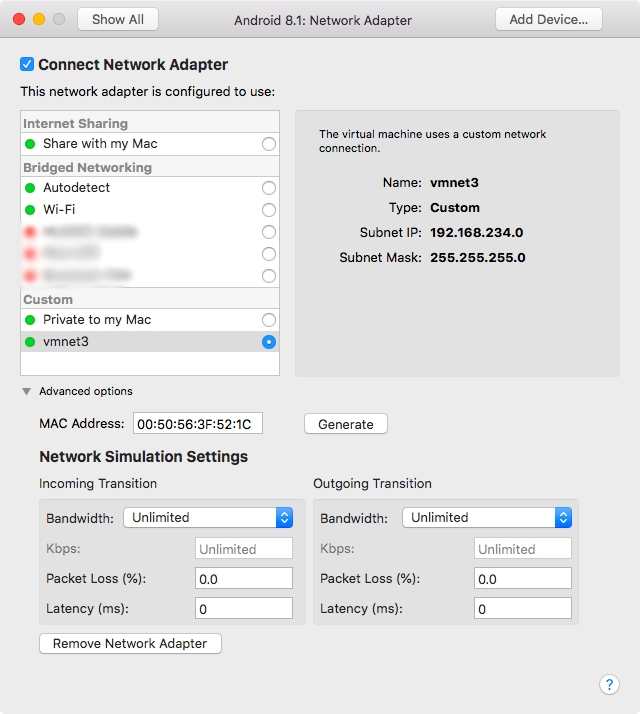
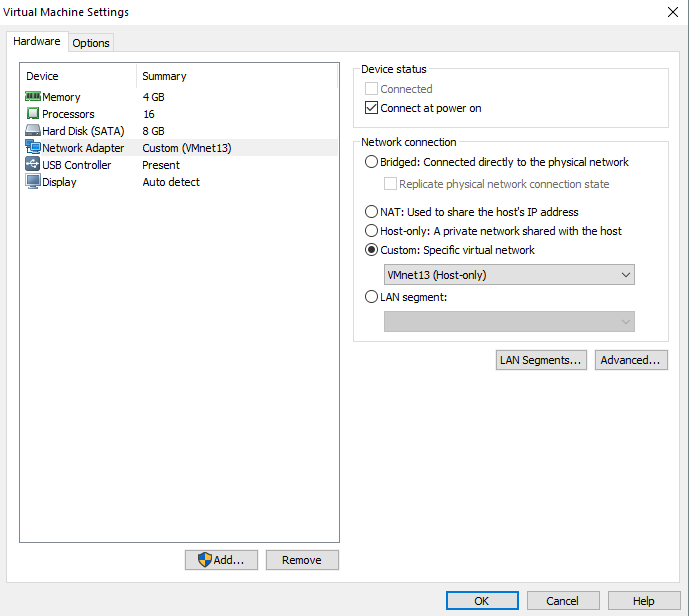
Now connect that network adapter to an Android VM (Connected at power-on). And power-it-on.
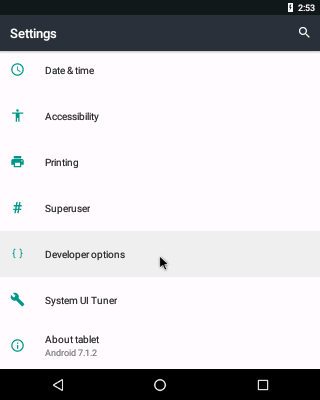
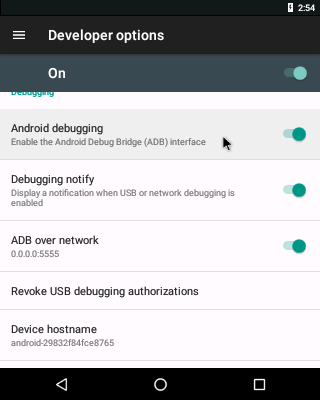
Once the Android VM finishes booting, go to Settings and enable USB Debugging + Verify Apps via ADB + ADB over network.
Open a console and execute “netcfg”. You’ll be presented with a screen similar to this.
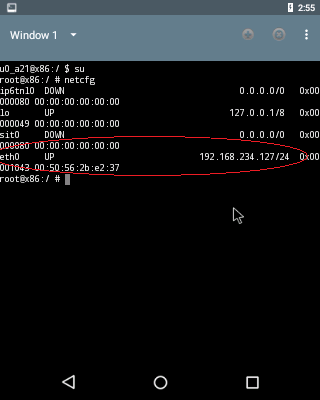
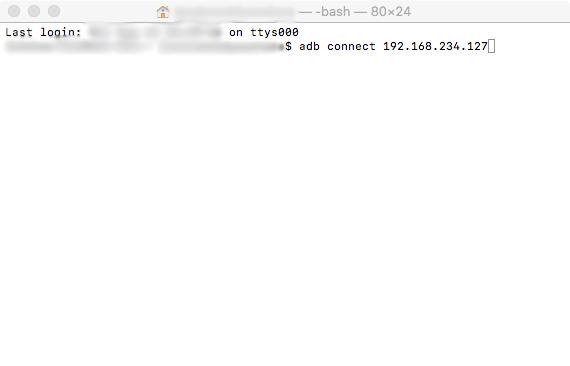
Find “eth0” IP address and execute “adb connect eth0’s IP” in a console on the Host. You’ll be presented with “connected to eth0’s IP”. Done!
But not quite. ‘Cause as we stated above, some distros of Android don’t have the “netcfg” command, in which case you’ll be left in a pickle. So when you type “netcfg” you’ll probably get this:
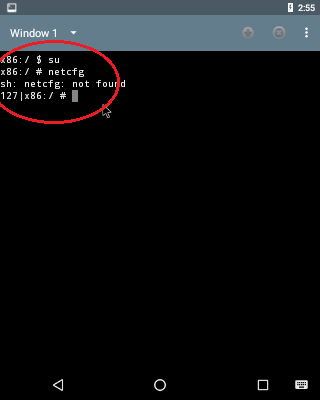
So, what now? Now this is where that guesswork comes in. Remember how we made those start-end IP addresses nearer to each other? Well this is when that helps us. Now –in a console on the host- try all those IPs ‘till one of ‘em hits home (if your start and end is like in the example, try “adb connect 192.168.245.128/129/130”, and one them will work). If ADB says that it’s connected to an IP, use ADB like a normal device. Cheers! 🙂
If that didn’t work, here’s where it becomes even more of a pain in the rear; for some strange reason, only some builds of Android x86 work with ADB like this, while others just don’t connect and stuff. Here’s a list of builds that I’ve tested to work (if other builds work, please drop a comment below):
Android 4.4 R5 (“netcfg” works)
Android 5.1 RC1 (“netcfg” works)
NOTES
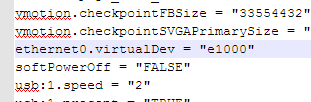
- You might need to change the network adapter to Intel 1000 in the VM’s VMX file (only on some builds).
- CyanogenMod/LineageOS x86 builds have a switch in the quick settings bar that tells you the IP of the VM, but network connectivity was often unreliable on 13.0/14.1/15.1 builds.
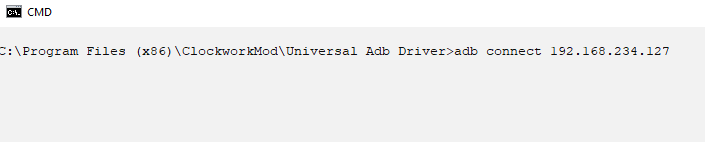
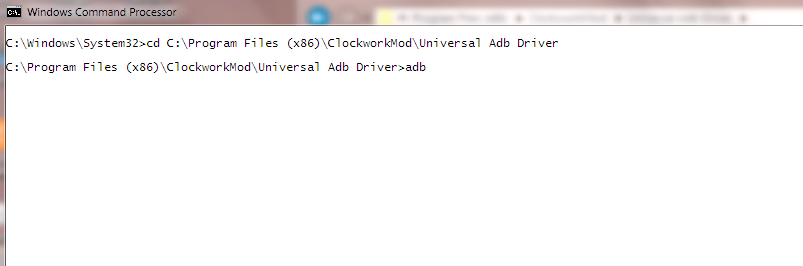
- Windows users will need to execute ADB commands in after chdir-ing to the installed directory as shown below.
- If, after sometime ADB no longer connects to Android VMs or netcfg displays “0.0.0.0” or an IP address outside of the zone you defined before, try restarting the host machine.
If everything went well, you will have a sandbox environment faster and easier to use than Android Studio.

If you would like to increase your knowledge only keep visiting this site and be updated with the latest news update posted here.|
LikeLike
I couldn’t resist commenting. Well written!
LikeLike